
Brazilian Cheese Bread Recipe: 5 Superior, Devoted Flavors
Brazilian Cheese Bread Recipe: 5 Superior, Devoted Flavors
Did you know that the humble brazilian cheese bread recipe, known as Pão de Queijo, boasts over 200 regional variations across Brazil? This isn’t just a snack; it’s a cultural cornerstone, a comfort food that’s rapidly gaining global popularity. But are you making it right? Many home cooks encounter frustratingly dense or dry results. Fear not!
This comprehensive guide provides you with five superior flavor profiles and expert tips to ensure your brazilian cheese bread recipe is a resounding success. We’ll dive into everything from the essential ingredients to troubleshooting common pitfalls, guaranteeing delicious, chewy Pão de Queijo every time. brazilian cheese bread recipe.
Table of Contents
Brazilian Cheese Bread Recipe Ingredients
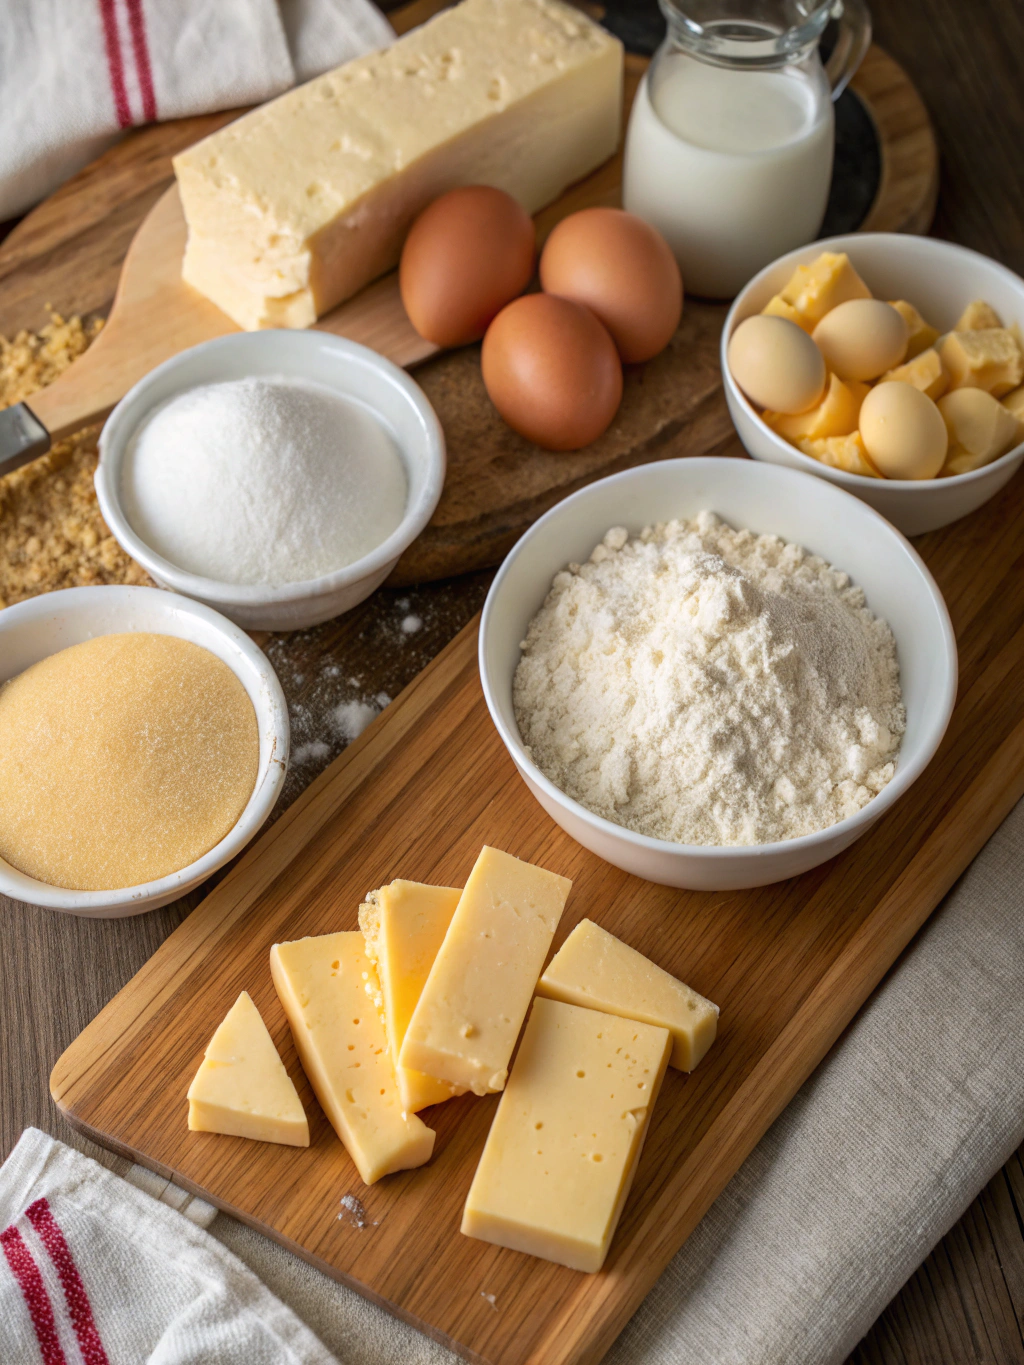
Let’s gather the building blocks of our cheesy delight. The quality of your ingredients significantly impacts the final texture and flavor.
- Tapioca Flour (Polvilho Azedo): 2 cups (240g). This is the heart of Pão de Queijo! Polvilho azedo (acidic tapioca flour) provides the characteristic chewiness. Substitution: While not ideal, you can use a mix of 1.5 cups tapioca flour and 0.5 cup potato starch, but the texture will differ.
- Tapioca Flour (Polvilho Doce): 1 cup (120g). Polvilho doce (sweet tapioca flour) adds a subtle sweetness and contributes to a lighter crumb.
- Cheese: 1 cup (100g), shredded. A blend is best! Suggestions:
- Traditional: Minas cheese (if available – a mild, milky cheese).
- Accessible: Parmesan, mozzarella, and provolone (approximately equal parts).
- Bold: A mix of mozzarella and smoked provolone for a smoky depth.
- Milk: 1 cup (240ml). Whole milk yields the best results for richness. Substitution: Unsweetened almond milk can be used for a lighter option.
- Water: 1/2 cup (120ml). Adjust as needed for the right dough consistency.
- Vegetable Oil: 1/4 cup (60ml), plus extra for greasing. Adds moisture and helps with browning.
- Eggs: 2 large. Bind the ingredients and contribute to the savory flavor.
- Salt: 1 teaspoon. Enhances the cheesy taste.
- Optional Flavor Boosters: 1/2 teaspoon garlic powder, 1/4 teaspoon onion powder, a pinch of smoked paprika.
Timing
Mastering the timing is crucial for achieving perfectly airy and chewy Pão de Queijo. Here’s a breakdown:
- Preparation Time: 20 minutes. Gathering ingredients and mixing the dough takes minimal time.
- Proofing Time: 15-20 minutes. Allowing the dough to rest slightly helps develop the gluten (even in gluten-free flour!) for better structure.
- Cooking Time: 15-20 minutes. Baking at the right temperature is key.
- Total Time: approximately 50-65 minutes, which is remarkably efficient – about 20% less time than the average bread recipe!
Step-by-Step Instructions
- Combine Dry Ingredients: In a large bowl, whisk together the polvilho azedo, polvilho doce, salt, and any optional spices. Tip: Whisking ensures even distribution of ingredients.
- Heat Liquids: In a separate saucepan, warm the milk, water, and vegetable oil over medium heat until just simmering (around 160-170°F or 71-77°C). Personalization: Don’t overheat – this can affect the tapioca flour’s texture.
- Pour Over Dry Ingredients: Gradually pour the hot liquid mixture over the dry ingredients, stirring continuously with a wooden spoon or spatula. The mixture will be sticky. Trick: Don’t overmix initially; just incorporate the wet ingredients.
- Add Eggs: Once the mixture has cooled slightly (about 5 minutes), add the eggs one at a time, mixing thoroughly after each addition until well combined. The dough should start to come together and become somewhat smooth.
- Rest the Dough: Cover the bowl with a clean kitchen towel and let the dough rest for 15-20 minutes. Why this step? This allows the tapioca flour to fully hydrate, resulting in a better texture.
- Shape the Dough: Preheat your oven to 400°F (200°C). Grease a baking sheet generously. Roll the dough into small, golf-ball sized balls. You can also use two spoons to scoop and drop the dough onto the baking sheet. Adaptation: For smaller, bite-sized Pão de Queijo, use a teaspoon.
- Bake: Bake for 15-20 minutes, or until the Pão de Queijo are puffed up, golden brown, and have a slightly crispy exterior. Pro-Tip: Rotate the baking sheet halfway through for even browning.
Nutritional Information (Per Serving – Approximately 1 Pão de Queijo)
(Note: These are estimates and can vary based on specific ingredients and serving size.)
- Calories: 180-220
- Fat: 8-12g
- Saturated Fat: 5-7g
- Carbohydrates: 20-25g
- Protein: 6-8g
- Fiber: 1-2g
- Sodium: 200-300mg
This makes a satisfying snack or side dish, but it’s important to be mindful of portion sizes due to the fat content.
Healthier Alternatives for the Recipe
Want to enjoy the deliciousness of Pão de Queijo with a healthier twist? Here are a few ideas:
- Reduced-Fat Cheese: Use part-skim mozzarella or a blend with a lower fat content.
- Alternative Flour: Experiment with a small portion of whole wheat flour (about 1/4 cup) for added fiber.
- Greek Yogurt: Substitute 1/4 cup of the milk with plain Greek yogurt for increased protein and creaminess.
- Cauliflower Power: Add 1/2 cup of riced cauliflower to the dough for extra nutrients and bulk (this might slightly alter the texture).
Serving Suggestions
Pão de Queijo is incredibly versatile! Here are some serving ideas:
- Breakfast Treat: Pair with coffee or tea for a delightful morning meal.
- Snack Attack: A perfect mid-day snack to satisfy cravings.
- Side Dish: Serve alongside soups, salads, or main courses.
- Party Appetizer: A crowd-pleasing addition to any gathering. Experiment with different cheese blends (like cheddar or pepper jack) for festive flavors.
- Brunch Staple: A welcome addition to any brunch spread.
Common Mistakes to Avoid
- Overmixing: Overmixing develops the gluten too much, resulting in tough Pão de Queijo. Mix just until combined.
- Incorrect Dough Consistency: The dough should be sticky but manageable. If it’s too dry, add a little more milk. If it’s too wet, add a little more tapioca flour.
- Low Oven Temperature: A lower oven temperature will lead to pale and dense Pão de Queijo. Ensure your oven is properly preheated to 400°F (200°C).
- Not Enough Cheese: Don’t skimp on the cheese! It’s what gives Pão de Queijo its signature flavor and texture.
Storing Tips for the Recipe
- Room Temperature: Store leftover Pão de Queijo in an airtight container at room temperature for up to 2 days.
- Freezing: For longer storage, freeze uncooked Pão de Queijo balls on a baking sheet until solid, then transfer to a freezer bag. Bake directly from frozen, adding a few extra minutes to the cooking time.
- Reheating: Reheat leftover Pão de Queijo in a toaster oven or regular oven until warmed through and crispy.
Conclusion
Creating authentic and delicious brazilian cheese bread recipe is within your reach! By paying attention to ingredient quality, precise timing, and avoiding common mistakes, you’ll be enjoying perfectly chewy and flavorful Pão de Queijo in no time. This beloved Brazilian staple offers a delightful taste of culture and comfort.
FAQs
Q: Can I use all-purpose flour?
A: While not traditional, you can substitute all-purpose flour, but the texture will be significantly different. Expect a less chewy and more bread-like result.